Monday, May 25, 2020

A Pair of 1840s Bonnets

So this week's video is actually about 1840s caps but I just finished a couple of bonnets (didn't film making them) but wanted to share them here anyway.

Both are made from Timely Tresses' Lydia Alma bonnet.  I was confused with the sizing on the pattern and ended up making a very small size on the first go around.  I got the form all the way complete before I noticed.


Fortunately, I had plenty of buckram so I just made the next size up, which was exactly what I wanted.  I spent the better part of a day on it, but millinery is fairly mindless work (although it isn't very elegant to work on, as working on 3D pieces isn't always so graceful!) so it went together fairly easily.  The silk is from Ebay, leftover from another project.  All the trimmings come from Timely Tresses as well, and I used fewer than I thought I needed.  I opted to not put trimmings inside the bonnet as I am not a fan of the rustling sounds near my ears-it makes hearing somewhat difficult in my opinion.  But that's just fine-there are examples of original bonnets without trimmings.

Some bonnets with interior trimmings, some without.
I think the brown ostrich feathers may be some of my favorite things ever.  I love the natural earth hues and the general fluffiness of them!


As for the second bonnet, I just couldn't let it go to waste.  My friend Paula has her bonnets custom made a bit smaller than average so I thought that it might make her a good 1840s bonnet.  I asked if she wanted it and then recovered it with what I had in the stash.  Paula picked out the pink ribbons to go with the black silk.  I think that color combination looks fantastic!


Hopefully the craziness will die down by November so we can wear them to Landmark Inn!

Enjoy!

Monday, May 18, 2020

A Study of an Original Bodice

I've finally done it.  I've started collecting original clothing.  I've stayed away from it so far because of budget constraints but I decided that if I can own 50 original parasols, I can forgo a few parasol purchases to get a few clothing items.  The first I have purchased is this lovely 1860s black silk bodice.


She's quite tiny-she doesn't even fit Edith!

Original bodice; reproduction skirt-post to come!!

Her waist is 23.5", bust 35.5".  Neckline is 14.25", shoulder seam is 7.75", and armscye is 12.5".

The bodice is completely hand sewn.  The back is a faux-three piece back, but the lining of the bodice is in two pieces and whipped together.


The bodice is lined in a brown cotton sateen but the sleeves are lined in a brown polished cotton in the same shade as the sateen.


The sleeves are coat with a little puff at the end.  The puff is lined in black cotton tarletan and trimmed with a 1/8" velvet ribbon on the puff and edged in a 3/8" ribbon that has been folded in half to encase the raw edge.


The coat sleeve is trimmed with two rows of a 1" black velvet and is faced on the inside with the fashion fabric about 2" deep.


The neckline, armscyces, and waist are all piped.  There are two boned darts on either side of the center front.  The boning appears to be baleen.


The front closure is black dorset buttons and hand bound buttonholes, with ?? hooks and eyes from the waist to the bust for added support.  The eyes side of this is boned as well.


None of the raw edges are finished in any way.


Her silk is tearing a little, particularly around the shoulders, but for $25, I had to bring her home!

My next step is to re-create this bodice as closely as I can for my next dress.  Stay tuned!

Enjoy!

Monday, May 11, 2020

A Pair of Berlin Wool Work Slippers

I think a little change is in order for the blog.  Since isolation has given me some extra time, I have been trying my hand at doing Youtube videos with my sewing projects and have quite enjoyed it!  I think I shall continue that and use the blog as a research dumping ground per say to document the Youtube work.  Therefore, I think posts will go up on Mondays with the videos instead of Wednesdays as they have been.

Link to this week's video showing the assembly of the slippers.

Ah, needlepoint.  This particular style is called Berlin wool work.  It is found in all sorts of fun little historic do-dads from seat cushions to shoes.  And shoes are what we're talking about today.

V&A Museum

Augusta Auctions

Etsy.com

LACMA

National Trust

Although I never actually put up the post, about 3 years ago I made a pair of Berlin work slippers.  I spent months slaving away at the needlepoint, only to make them up and have them not fit!!!!  I have super wide feet and although I altered the pattern to fit my foot length wise, my foot would not go into the shoe.  It was very frustrating and I believe I ended up throwing the slippers away.  I put the notion aside a while, but decided to come back to it as I finished the Greek Key wrapper.

I wanted a pair of slippers to match the wrapper, although I have no evidence that slippers were matched to the wrapper.  The Greek key design seemed like a fun one to do have on a pair of shoes and I can wear them with more than just that particular wrapper.

The first step was to make a mock up-or two.  About this time last year, I made up a pair of silk slippers and a leather pair.  You can read up on that here.  I then used that upper pattern to make a needlepoint pattern that I knew would fit me.  Here are some originals from the period.

Peterson's Magazine, April 1865

Englishwoman's Domestic Magazine

Englishwoman's Domestic Magazine

Arthur's Home Magazine, 1862

Godey's Lady's Book, July 1855

Then it was off to needlepoint.  I used 18 mesh Penelope canvas for the ground and Appleton's crewel wool for the yarn.  Lovely stuff to work with!  I spent a year off and on working on them in my casual time, determined to get them done for Welbourne in October (that fell through-the slippers first then the event itself) then for Welbourne in April (the event fell through, but I managed to get the slippers done a week before the event was planned!).  Finally, the embroidery was done.  I failed to get photos of the finished embroidery, but here are some originals where they embroidery is done but the slippers never got made up!

McCord Museum

Etsy.com

picclick.co.uk

The next step was to put the slippers together.  The only part I really struggled with was lining material.  I ended up using a light silk in a color that matched the pattern but I now think that what I thought was silk may actually be polished cotton.  Well, lesson learned.  I'll try that next time (and yes, there will be a next time.  Already working on them).

Vintage Textile

Old Sacramento Living History Program

McCord Museum

I finished my slippers with some black silk ribbon that matched the ground of the embroidery.  I'm quite happy with the result!


For my next pair, I have extended the toe part to make the slippers longer and hopefully more elegant while still fitting well.  I am working on an 1840s pair and then have an 1830s pair lined up.

Enjoy!

Wednesday, May 6, 2020

An 1840s Wrapper

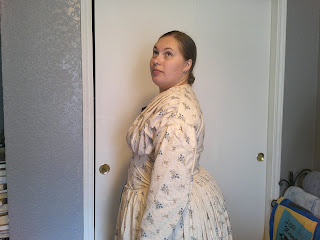
This isolation period has been a time of optimistically prepping for future events.  This project is meant for Landmark Inn, where the target year is 1844.  I use my later wrappers so much that I knew an earlier one would be very useful.

I used a pattern from a book.  The pattern was taken directly from an original and therefore had to be enlarged and fitted to myself.  Martha McCain took the pattern from the original.  The book is below as well as the pictures of the wrapper.


It was a fairly simple garment to make up, completely hand stitched, of course.  I think I could have added a bit more width across the front of the wrapper-particularly for the skirt, but I am pleased with it. I tried very hard on the bodice to get the backstitches small and even-15-19 stitches to an inch.

The original wrapper featured seven different cottons in the garment (three different linings, fashion fabric, and three different facing fabrics).   I used four (one lining, fashion fabric, and two different facings).  Right now the belt is closed with a bit of silk ribbon but I don't like the way it matches the fabric so it may be changed.

Speaking of fabric, I thought the fabric matched with the original dress below nearly perfectly when I purchased it.  It wasn't until it was cut and I was starting to sew the skirt until I noticed the tiny green stars that most certainly are not correct.  Such a shame.  A great, period cotton ruined.  Oh, well.  I continued making it up and may perhaps replace it eventually with a more appropriate pattern.  I think a plaid would be lovely with that bias belt.

Anyway, on to the pictures!


Enjoy!