Sunday, October 24, 2021

I'm still putting out content...

 Just not always here :).  Last year, I started a Youtube Channel where I started documenting the projects I would otherwise document here.  For a while, I was writing a blog post AND doing a video for each project but that simply was too much work.  I opted for putting the research in the video instead of here.


I am still keeping the blog up and running and I WILL post here from time to time.  Sometimes there is just too much research into a particular project or topic that I will info dump here to pair with a weekly video.  So expect less frequent posts here.  If you're interested in keeping up with me, subscribe to the Youtube channel or follow me on Instagram.  Videos are going up on Mondays on Youtube (yes, every Monday just like it used to be every Wednesday here) and I'm trying to post at least 1-2 Instagram posts a week.  When events start happening, it'll be more frequent.


Thank you!

Monday, February 15, 2021

My First 1830s Dress

 Finally, we have a dress!  With all the shawls, bonnets, caps, petticoats, and other various 1830s dresses, I was wondering if we'd ever get to making the dresses!

The fabric is Andover's Chatham Hall collection, I'm not sure of the exact title.


The design is similar to several original 1830s dresses, which is why I chose it.

Kerry Taylor Auctions

Mode Muze

Philadelphia Museum


The only thing that I didn't like about the fabric was the monotone fabric (that fear was eased when I found the Philadelphia Museum dress above) and the fact that it has little dots all over it.  But according to the Mode Muze, that particular dress is described as "made of fine white cotton, printed background of purple dots and stripes in whimsical motifs in lilac, beige, red and green".  Also, this dress from the Metropolitan Museum of Art has dots as well.


For my dress, I decided to copy one that is for sale on Etsy right now.


It's a front closing gown (yay!) that's made from a cotton print.  The nice thing about for sale items is that you generally get really detailed pictures.  I could tell exactly where this gown was piped, how it was closed, what was cut on the bias vs on the straight, etc.  That was extremely helpful while I was planning out this dress!

The only thing I really changed from the original was to add more hooks and eyes for closures and skirt slits to access pockets.  There were no picture of the hem but I could tell that the skirt was not lined, so I opted for a very short facing to finish off the hem.

I also added a self fabric pelerine that is piped along the edge.  I used a Workwoman's Guide pattern for that, which was helpful.


Many more to come!

Enjoy!

Monday, January 18, 2021

Sealing Wax and Wafers

 This was quite a new concept for me as by the 1850s, we had gummed envelopes so wax and wafers were old fashioned by my usual time period.  But delving nearly 20 years prior, I've had to pick up some new skills along the way.

Back of a letter written by my living history character, Sarah Wharton
Yale University Archives

On the back of Mrs. Wharton's letter, you can see remnants of a seal.  The actual seal is missing (I believe it was on the chewed away parts) so we can't actually see what her seal was.  But I CAN tell you Sarah used red sealing wax!

The first step was to order a custom seal for Sarah.  I chose a simple SW for her initials.  Looking at original seals, initials seem to be popular for 1820-1840.  Some had the first, middle, and last initial; but I chose just first and last 1) because 2 letters fit on the seal better than 3 and 2) her initials spell SAW and I didn't want there to be any confusion that it represented initials not a word.  And since we can't see Sarah's actual seal, it could have been almost anything.

Now Sarah was wealthy and therefore probably had a fancy seal.  Possible precious metal and stone or more likely ivory or bone.  I did wood because that was what I could get.  I decided that since this isn't Sarah's 'real' seal but rather one that sits with her traveling port folio, she may not have spent the extra money on something that could have gotten misplaced on all her travels.  Therefore, I decided cheaper was okay for this project.

I ordered a seal from Etsy that works just fine.


Then I set about making some sealing wax.  I didn't necessarily have to as you can still buy sealing wax today, but I thought it would be fun making my own even though Sarah most definitely would not.


I used olive oil instead of turpentine but otherwise followed the receipt as far as main ingredients.  Of course, vermillion is poisonous and otherwise unavailable should I even want to use it so I used red mica powder instead.  This first batch turned out rather transparent so next time I will add more colorant.


I did not make purple but did attempt black, green, blue, and yellow.  I used my own colorants that I already had, although I know I can get verdigrise for green next time.  This go around, I used terre verde from earthpigments.com for green, brilliant yellow of the same company for yellow, blue mica powder for the blue, and black mica powder for the black.


The blue turned out especially well.


Next up were wafers.  I used "
The New Family Receipt-book" published in 1811.


I couldn't get the isinglass to dissolve so I had to forgo that.  I also took out the yeast because I had a hard time getting them thin enough without leavening.  There are other receipts that only call for flour, water, and colorant so I didn't feel bad leaving it out.

Next time, I'll try Brazilwood for read, indigo for blue (I tried but I couldn't quite figure it out yet.  I'm working on it),and probably turmeric for yellow (I didn't have any in my pantry at the time).  Food coloring will work for now.  These are still experiments.


The wafers are still quite thick as you can see.  I'm working on thinning them down as the originals that are seen are nearly paper thin.
Original wafers from Ebay

 But I'm still happy with how the whole project came out!


Monday, January 11, 2021

Writing Portfolios and Pen Wipers

 This was just supposed to be just the traveling port folio from the Workwoman's Guide but turned into quite a project!

The portfolio is made from bookboard and covered in black silk trimmed with green and brown silk ribbon.  It is filled with a turtle pen wiper, pen nibs, a bone pen, a horn pen, two pencils, tapers, a seal, sealing wax, a letter opener, and a knife.  It turned out cute!


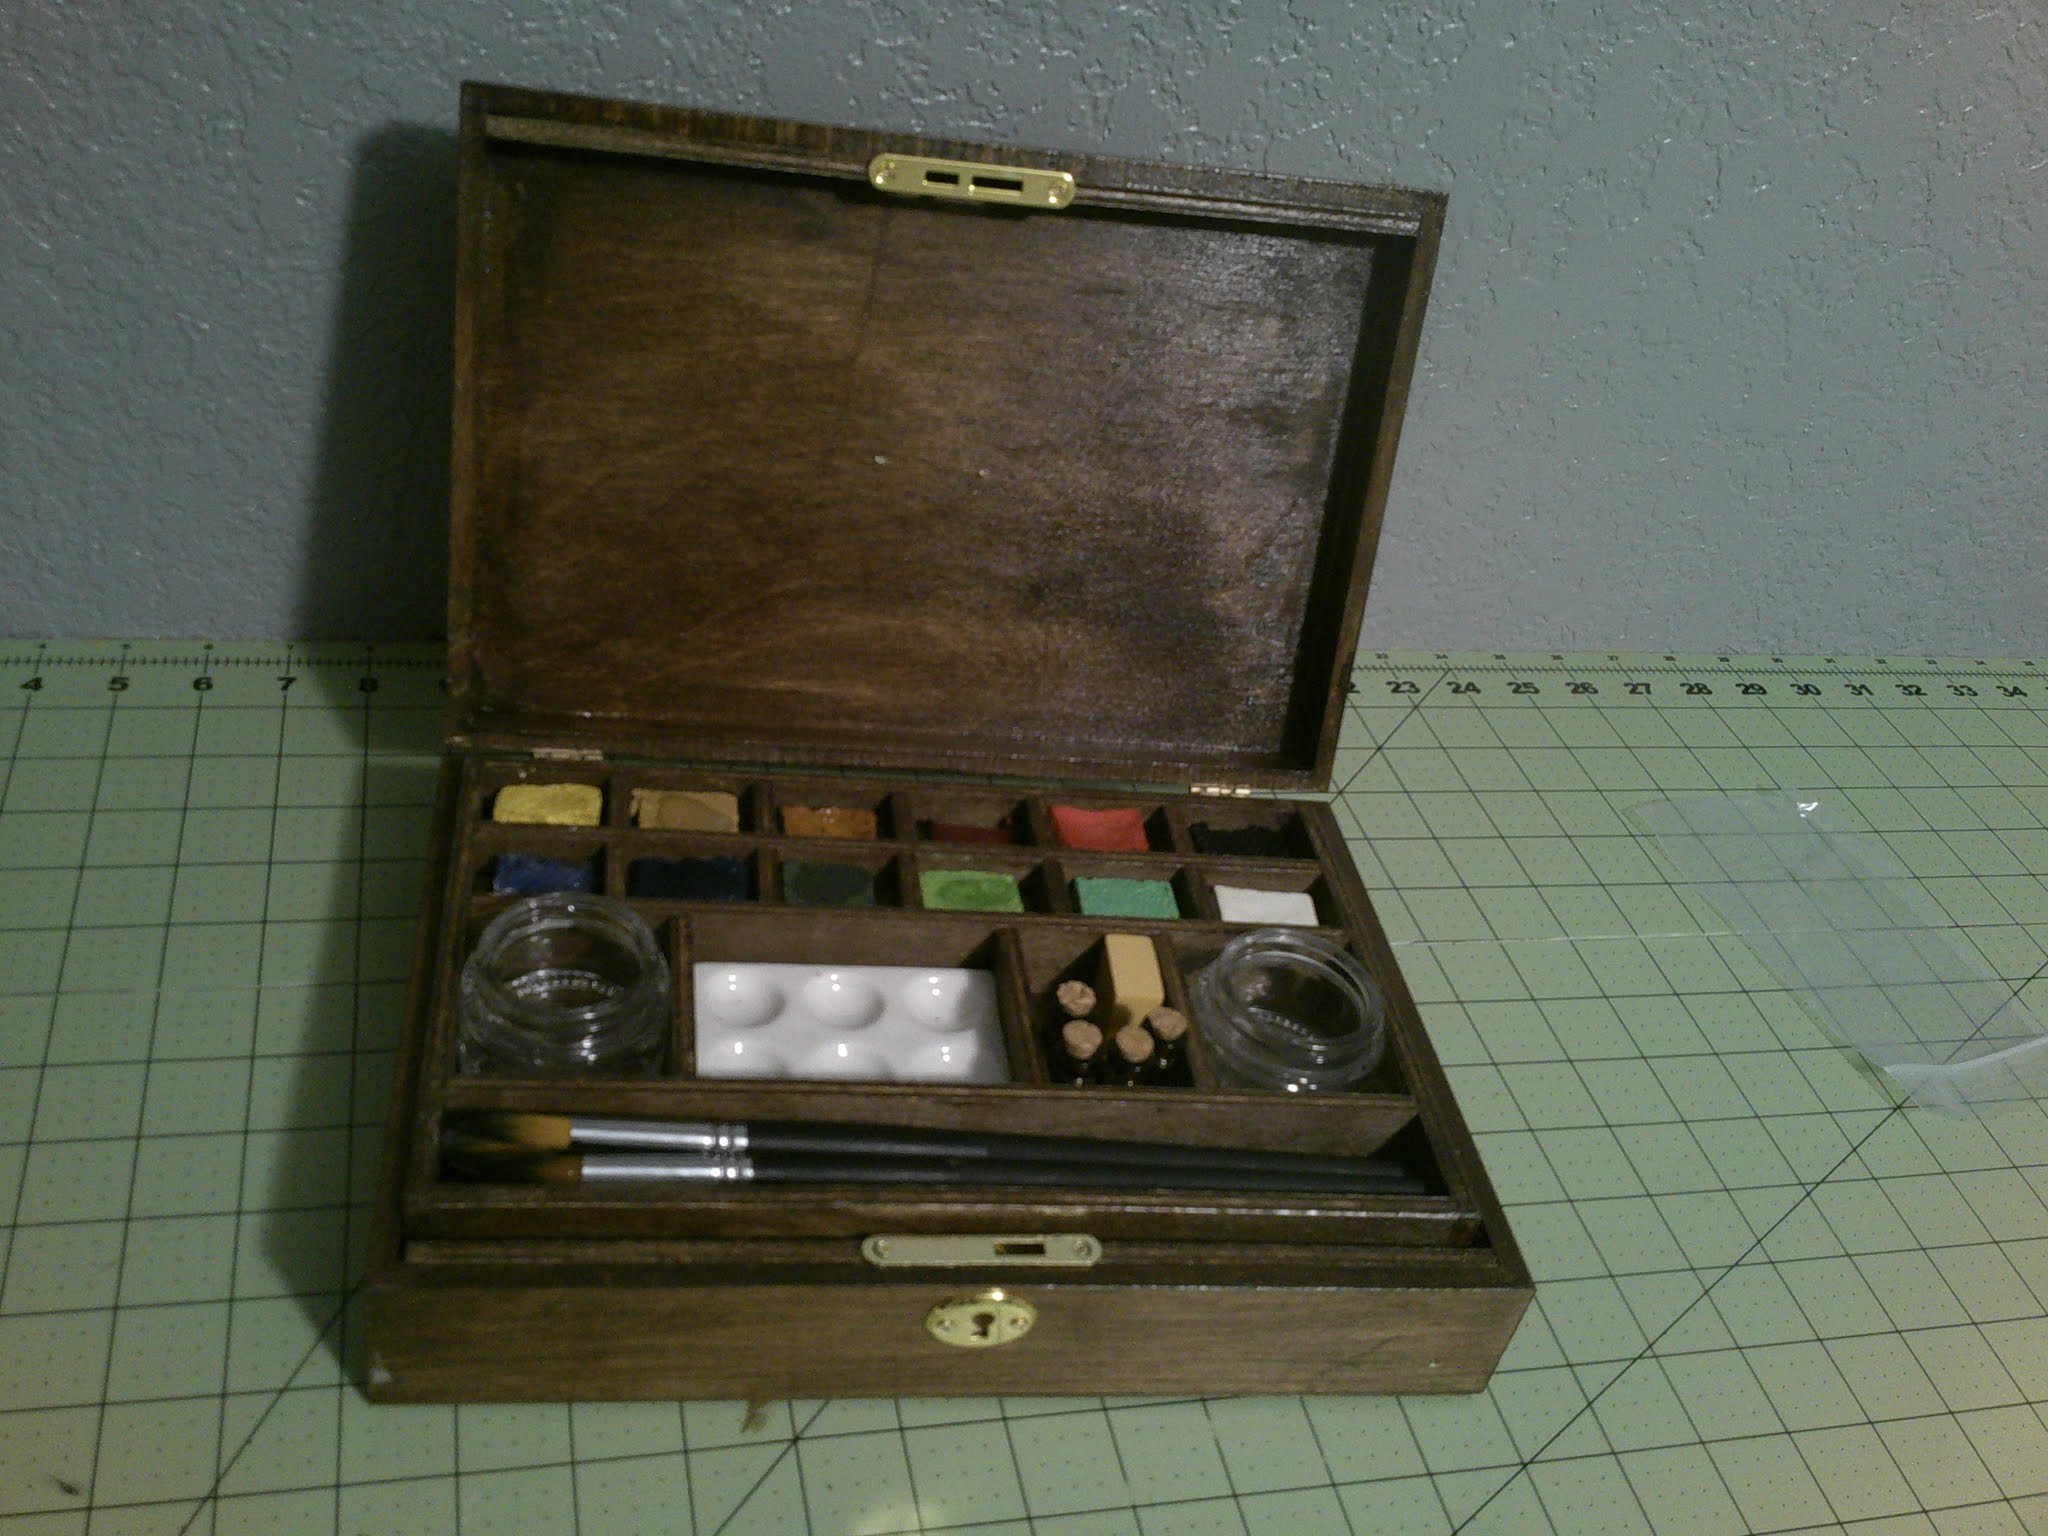
The 1860s writing desk was put together with mostly the same items, except I added stamps and gummed envelopes for events post 1858.


For both desks, I made my own ink out of walnut shells which was a fun experience.  Then I made SEVERAL pen wipers.  I'm going to take 2 of them to sell at the Texas Living History Association's auction.

Aside from the turtle one, I made two pinwheel pen wipers, one with a crochet top and bottom with ceramic squirrels on top, and another plain with just a china button.


Then I made a strawberry pen wiper based off this original from Peterson's Magazine, 1865:


I used glass beads for the veins and crocheted the strawberries.  The actual directions I used were something of this sort:

Chain 4, then join with the 1st chain with a slip stitch
Single crochet around (4 stitches)
2 single crochet in each stitch around (8 stitches)
Single crochet around (8 stitches)
Single crochet around, but increase every other stitch (12 stitches)
Continue in that pattern (plain row, increase row, plain row) until it looks like a strawberry.  Stuff the strawberry then single crochet in every other stitch until the strawberry is closed.  Tie off.

The little green stem bit was as follows:
Chain 5, single crochet back down, slip stitch in the 1st chain, chain 5, single crochet back down, slip stitch in the 1st chain, chain 5, single crochet back down, slip stitch in the lst chain.  Then I stitched it on the strawberry and beaded the strawberry with yellow glass beads.


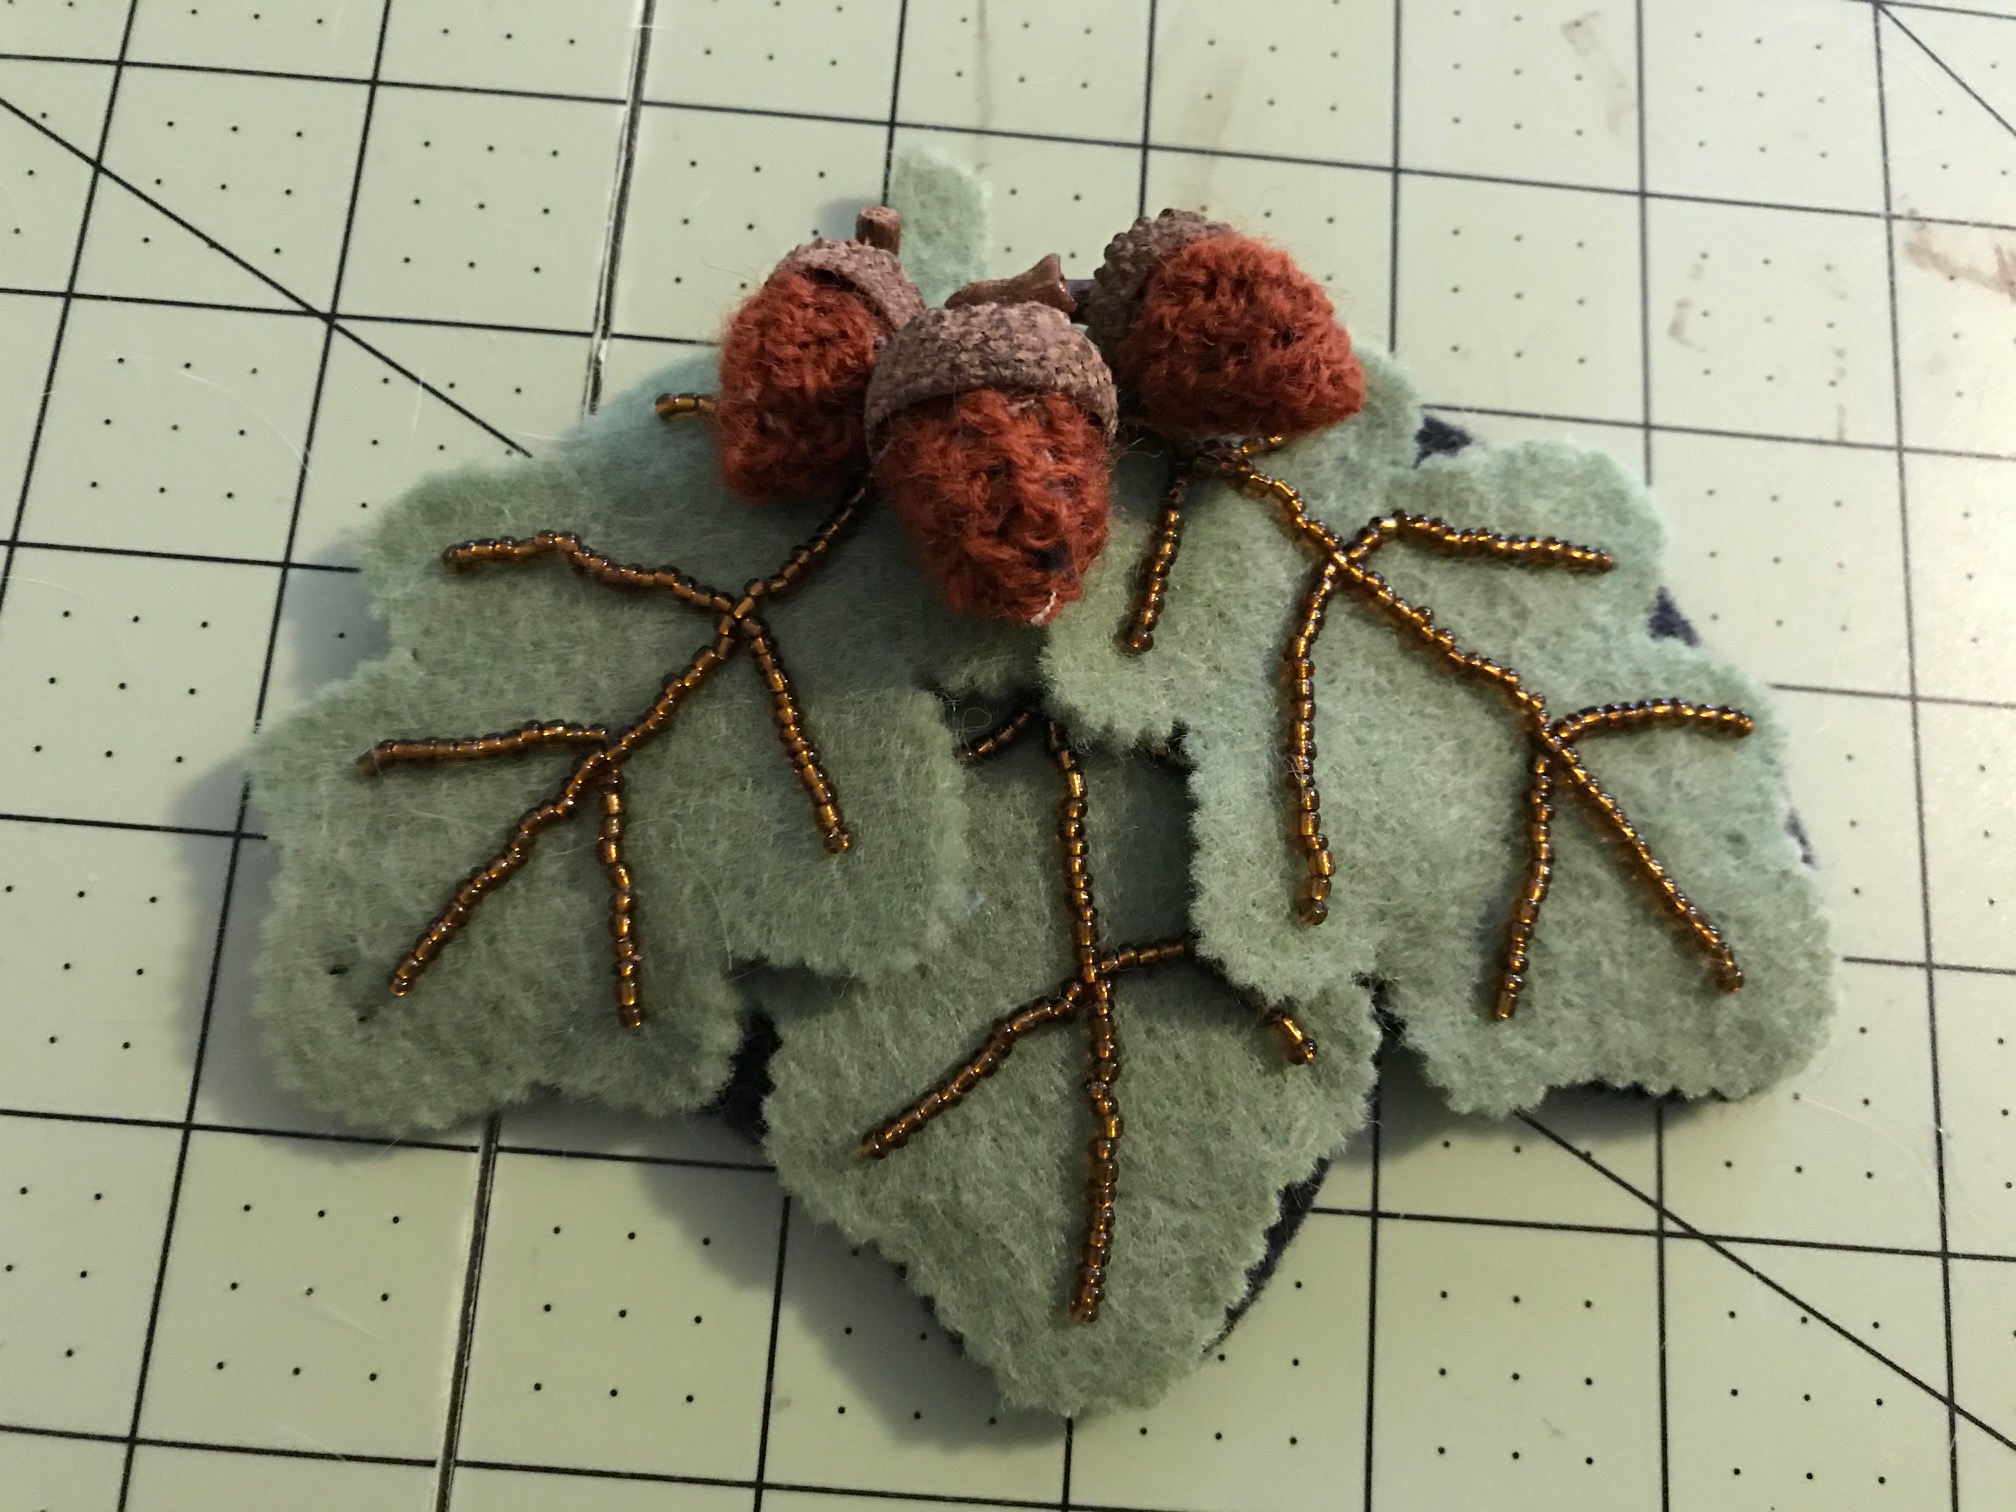
I also did an acorn pen wiper from an 1868 Godey's Lady's Book pattern.


I used real acorn hulls but crocheted the actual acorns using a very similar pattern to the strawberries, but smaller.

Chain 2, slip in the 1st chain.
Single crochet 4 times in 1st chain.
Do 2 single crochet in each stitch (8 stitches).
Single crochet across (8 stitches) x2
Stuff the acorn.
Single crochet, skip a stitch, single crochet until the hole is closed.


The project turned out super cute!


Enjoy!

Monday, December 21, 2020

Recreating an 1830s Watercolor Box and Portfolio

 This is something I definitely never thought I'd be making as I've never was into painting or drawing.  I received very little instruction in these mediums and they never particularly appealed to me.  But as I am striving to educate myself to the extend of a highly educated woman in the 19th century (due to living history personas' education levels-I have to be able to pass as one of them while in character!  It's not like living historians get a script!), art was on my list of things to learn.  As such, I needed a pretty little box to store art supplies.  A short trip down research lane landed me with several options.
Hygra.com, 1829-1830
This one is especially neat as the artist's paintings
are still with the set!

Hygra.com, 1830-1840

Hygra.com, 1799-1816

Aren't they cute?  I opted to make mine look more like the last one.  I bought a simple walnut box off Amazon, a little smaller than the originals, but the same proportions. It doesn't have a drawer so I had to build a tray with extra wood.  I also bought the locking system and key from Amazon.  The stain and sealer were left over from another project.  It turned out cute!

For the interior, I chose two glass cups that I already had, some decent sable hair brushes (I made sure they had wood handles and I ended up painting over the company name on the handle to give it more of a period feel without the modern company name on them), various erasers, and a few phials to put ink into.  I also ordered another bone pen and a set of nibs as well as a mixing tray (sold on Ebay as a dental tray) and some charcoal sticks.  I am still in the market for a flat porcelain mixing tray.  The only ones on the market are wood or plastic!

Then it was time for the paints.  Here are the receipts I used.

The watercolor base is 1 cup HOT water, 1/2 cup gum arabic, and 1/4 cup honey.  1/2 teaspoon of glycerin can be added to reduce cracking.  Mix until the gum arabic is completely dissolved (this can take about 15-20 minutes or longer).

The basic 'recipe' for the pigments that fit into my tray consists of 2 spoonfuls of watercolor base (called 'mix' in the recipes below) and 3 spoonfuls of pigment.

1. 2 tsp mix + 3 tsp chalk
2. 2 tsp mix + 2 tsp ginger + 1/2 tsp chalk
3. 2 tsp mix + 2 tsp brilliant yellow + 1 tsp chalk (this came out too light-I'd suggest going all 3 tsp with the yellow)
4. 2 tsp mix + 3 tsp orange ochre
5. 2 tsp mix + 2 tsp narcoat mica powder + 1 tsp chalk
6. 2 tsp mix + 3 tsp raw sienna
7. 2 tsp mix + 1/2 tsp acid dye tobacco leaf + 1 drop vinegar + 1 1/2 tsp chalk
8. 2 tsp mix + 2 tsp violet ochre + 3/4 tsp chalk
9. 2 tsp mix + 1 tsp smoked paprika + 1 tsp chalk
10. 2 tsp mix + 1 tsp acid dye cayenne red + ¼ tsp vinegar + 2 tsp chalk
11. 2 tsp mix + 1/4 tsp acid dye cabernet + 2 tsp chalk
12. 2 tsp mix + 1 tsp shine red mica + 1 tsp chalk
13. 2 tsp mix + 3 tsp cochineal + 1/2 tsp vinegar (this was before lake pigment, just using ground up bugs)
14. 2 tsp mix + 1/2 tsp acid dye sour apple + 1/2 tsp vinegar + 3 tsp chalk
15. 2 tsp mix + 1/4 tsp acid dye moss green + 1/4 tsp vinegar + 3 tsp chalk
16. 2 tsp mix + 1/4 tsp fiber dye granny apple + 1/8 tsp salt + 2 tsp chalk
17. 2 tsp mix + 1 tsp dark green mica + 1 tsp apple green mica + 1 tsp chalk
18. 2 tsp mix + 1 tsp terre verde + 1 tsp chalk
19. 2 tsp mix + 1/4 tsp acid dye wedgewood blue + 2 tsp chalk
20. 2 tsp mix + 1/4 tsp acid dye peacock blue + 2 tsp chalk
21. 2 tsp mix + 1 tsp French turquoise + 2 tsp chalk
22. 2 tsp mix + 1 tsp cobalt purple mica + 2 tsp chalk
23. 2 tsp mix + 1 stick charcoal
24. 2 tsp mix + 1/8 tsp indigo + 2 tsp chalk

After mixing them into the silicone tray, I put them to dry.  You can do this by air drying (avoid sunlight) or if you're impatient like me, in the oven.  I stuck mine in at around 150 or 200 degrees F.  I left mine in the oven overnight to dry and they turned out well.  Don't put them any higher than 200 as I tried 250 and my paints turned out holey and airy, and misshapen/burnt when I put them at 250 for 2 hours.  Lower for longer is better.  Here is the color key chart for how these recipes turned out:


After this first attempt, I tried making lake pigments, which is just taking a liquid dye and reducing it to powder form using alum and washing soda (which is one way to do it).  I made lots of lake pigments-including from natural things such as cochineal (which was suppose to yield a red but I ended up with purple), beetroot (an ugly gray color if you can believe it), and cabbage (blue, green, or purple depending on how much alum I added to the mix).  I also used the Dharma trading dyes and make lake pigments but I would like to continue to experiment with this.  I only ended up using one of my Dharma lake pigment paint blocks in my final box as I managed to burn most of them on 250 degrees F.

For my final 12 blocks, here is the color template of the colors: 


From left to right, here are the recipes.

1. 2 tsp mix + 2 tsp brilliant yellow + 1 tsp chalk
2. 2 tsp mix + 3/4 tsp acid dye tobacco leaf + 1 drop vinegar + 1 1/2 tsp chalk
3. 2 tsp mix + 3 tsp orange ochre
4. 2 tsp mix + 3 tsp raw sienna
5. 2 tsp mix + 3 tsp red mica powder
6. 2 tsp mix + 1 stick charcoal (I didn't grind up the charcoal very well so it's lighter than the first batch)
7. 2 tsp mix + 3 tsp lake pigment made from Dharma's acid dye wedgewood blue
8. 2 tsp mix + 1/2 tsp acid dye peacock blue + 2 tsp chalk
9. 2 tsp mix + 1 tsp dark green mica + 1 tsp apple green mica + 1 tsp chalk
10. 2 tsp mix + 1/4 tsp fiber dye granny apple + 1/8 tsp salt + 2 tsp chalk
11.  2 tsp mix + 3 tsp terre verde

In addition to the box, I also made a portfolio to carry around my finished pieces and extra papers.  It is made with book board covered in leather on the outside and marbled paper on the inside.  I glued it all together with PVA bookbinding glue.  Then drilled holes to insert a lovely silk ribbon.  You see these types of portfolios a lot in paintings and fashion plates being used as an easel to draw upon.

Lady's Magazine, July 1830

"Portrait of the McEven Sisters" by Thomas Sully

Marie-Adelaide Durieux

Mode Parisiennes

Unknown

Unknown

Costume Parisian, 1816

Here is mine:


And the finished watercolor box:


Enjoy!