Monday, December 14, 2020

1830s Corset

 The last installment of the 1830s underpinnings!  Now I can finally start working on dresses.

I made my mock up of this pattern last year in December 2019.  I machine stitched it because I always knew it would be replaced by a better version eventually.  I didn't like how the bust fit, nor the tie on shoulder straps, not to mention I had to take a few big tucks in at the back to make it fit me and those were rather annoying.  Thankfully, this, my final version, has none of these issues.

I made this corset almost entirely out of scraps and bits left over from other projects so it didn't cost much at all!  I used white cotton sateen for the fabric, copious amounts of sugar'n cream yarn for the cording, lots of German plastic whalebone boning, a bit of metal boning for the center back, some metal grommets, and some silk ribbon.  The only things I had to purchase were a wooden busk and some lacing string.

My base is the Laughing Moon romantic corset pattern, view A.  The pattern itself fits me very well with very little alteration, although I did have to go down a few sizes to keep my corset from meeting in the back.  After cutting out the basic pattern, it was time to go back to originals to see how I could improve on the basic Laughing Moon pattern.

To make the bust fit better than the mock up (which falls down constantly despite the extra boning put in), I decided to cord the entire gusset area just like this original from the MET.
Another way I combatted the falling bust issue is to lengthen the boning and add a bit more.  This original shows a more heavily boned corset, especially throughout the bust.  I like how the boning goes down to the waist.  I didn't add quite so much, but I did lengthen the boning pieces from the pattern's suggestion.

Metropolitan Museum of Art, 1833

Most originals do show the entire set of stays backstitched, but there are originals that show the exterior stitching being done with a running stitch.  I copied those originals purely for my sanity throughout this project.

Metropolitan Museum of Art, 1815-1825

For decoration, I knew it needed to be fancy.  Sarah, after all, would be able to afford the best.  I considered heavy embroidery but decided against it-again citing my own sanity.  I did find a rather simple embroidery design using a herringbone stitch pattern that I decided to use instead. I, however, opted for a feather stitch instead of the herringbone pattern.

Metropolitan Museum of Art, 1830s

Instead, my eventual design outside of embroidery came out to be a rather hodge-podge of originals.  The top front (basically to the end of the gussets) is based on this original.  I only added cording to help support the bust.

Unknown collection

Lots of boning going down to the waist, very little embroidery (although I added some around the gussets as in the previous original).

From gussets down, I copied this original.

V&A Museum, 1825-1835

And another view of the same corset, this time from the side.  Look at all that boning!  This will be a very supportive corset!


The only thing I really changed was to do the embroidery seen above instead of the wavy thing going on in this corset.  I also added embroidery to the hip gussets to match the bust gussets.  The bones also received a fair bit of flossing on the top and bottom to hold them in place.


This corset closes with a spiral lacing as opposed to my typical 'bunny ears' style.  I considered fan lacing but decided to leave that for another day.

With all the fitting issues fixed and the added support in the back and bust, I think this corset turned out lovely!  Now we can start working on dresses.


Enjoy!


Monday, December 7, 2020

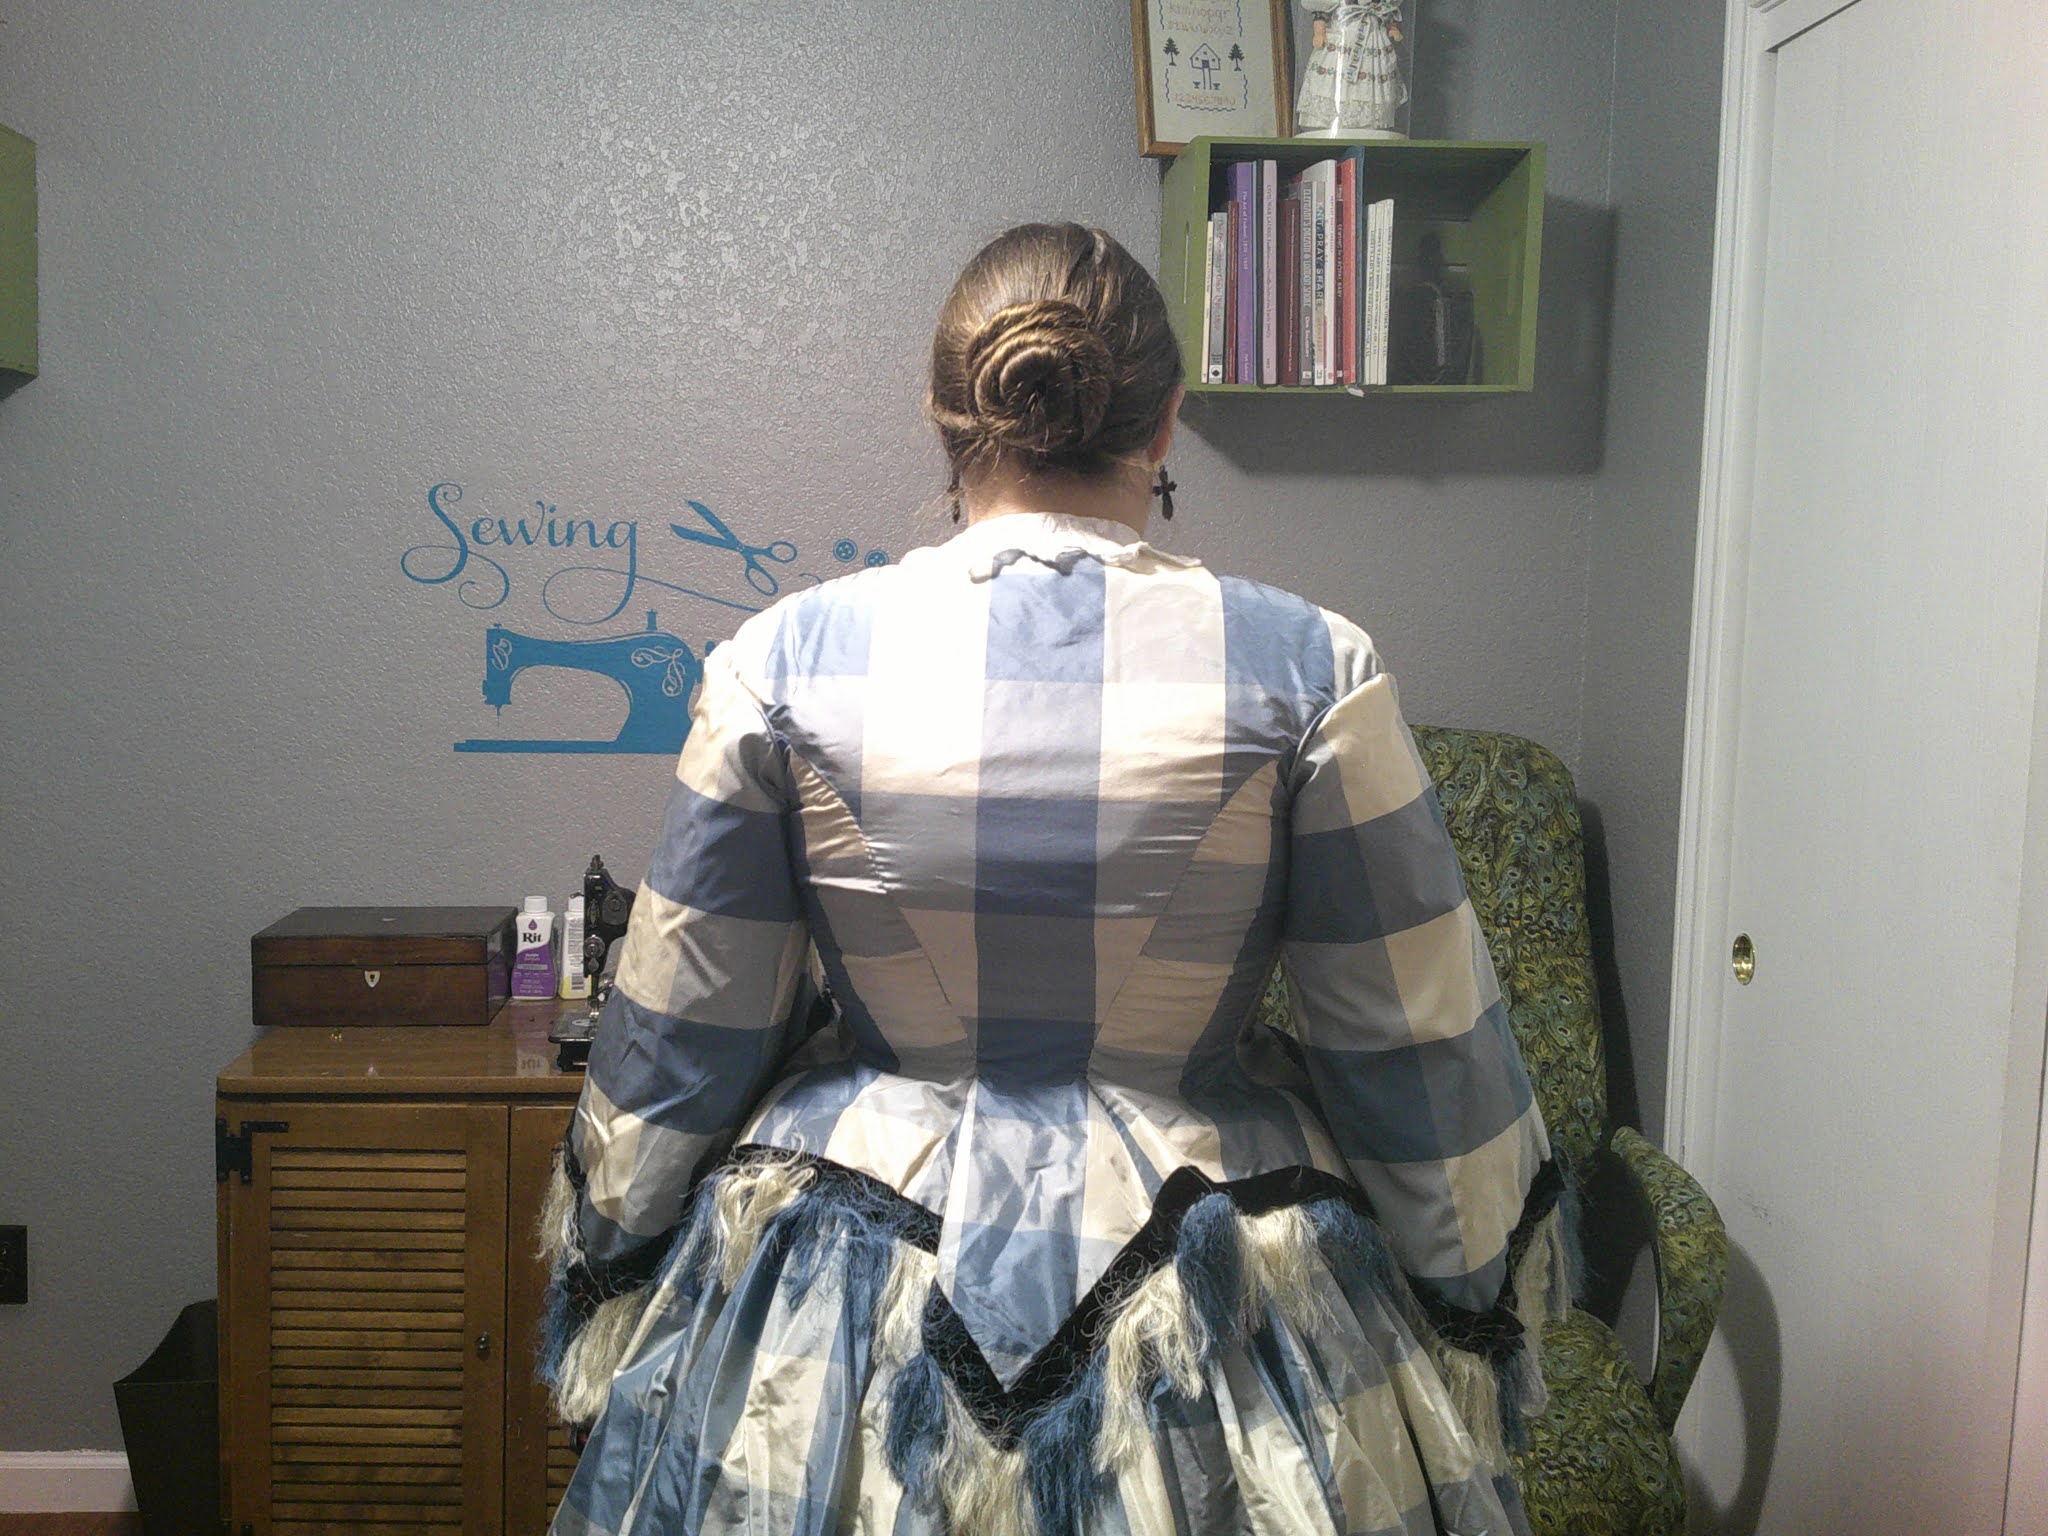
An 1850s Blue Checked Gown

This is another gown from the costume closet that needed some little updates.  I made this gown about 2 years ago, and although it was done very well, there was just a few things that needed to be done.

The fabric is a lovely large scale blue checked silk taffeta fabric I bought at Fabric Mart Fabrics at one of their $8/yard or $12/yard sales.  I can't remember exactly how much I paid for it.


It very much reminds me of the fabric this beautiful lady is wearing:

Unknown source

The basic design of the day dress was based off that photograph and also this original:

Ebay

First of all, the day bodice needed boning put in.  I also added some cute little glass buttons as decoration (more on the buttons later).  Afterwards, the only thing to do was to attach a real collar and undersleeves.  This set I hand embroidered from an 1853 Godey's Lady's Book pattern.


The Book only had the collar pattern so I modified the same design for the undersleeves.  I also have plans for a matching handkerchief but that is still getting embroidered.  For the undersleeves, I chose a design that seems to be quite popular among surviving originals.

Ebay

Museum of Fine Arts, Boston

I think they turned out cute!


The trim idea I got from a few different originals.  Now that I have made this dress, I don't think I'll ever put velvet ribbon on top of fringe again, but you do see originals with this treatment so it is by no means incorrect.

Metropolitan Museum of Art

Ebay


The main part of this project was making an evening bodice.  The design was a somewhat simplified version of these two originals:

Victoria & Albert Museum

Ebay

The button idea came from a multitude of sources, but here is a dress with lace surrounded buttons.

Metropolitan Museum of Art

Overall, I'm happy with the result!


Enjoy!

Monday, November 30, 2020

1830s Sleeve Support Puffs

 Ah, yes, the 'how' part of getting those gigantic 1830s sleeves.  I opted for a canned version instead of stuffing with wool roving.  I figured this way would be cooler.  All that was needed was some white cotton and some cane.  The sleeve plumpers are based off originals such as these:

National Museums of Scotland, 1830s

Metropolitan Museum of Art, 1828

Mine are more closely copied from the first originals.

It does seem (and so it bears mentioning) that the stuffed version of sleeve supports was much more popular in the period than boned versions.  I suppose because they are easier to figure out-they are just giant pillows!  But I hadn't seen anyone make a boned version and wanted to see how it would work out.  Plus, these are a whole lot lighter than wool stuffed pillows on my arms!

The Workwoman's Guide does not have directions for sleeve supports but on page 89, there are engravings and directions for several short sleeves which the author states could also be used as petticoat sleeves.  Now I'm sure she's meaning sleeves for a petticoat body, or a full dress petticoat, but the pattern looked about right to mimic the sleeve puffs from Scotland, so I used that pattern.

The Scottish puffs have the most wonderful zoom feature where you can see each and every stitch that went into them.  That was how I determined that there were canes both horizontal and vertical in the puffs.  They are of course hand stitched and are cut on the bias, just as the WWG describes.  I couldn't tell if the sleeves had a lining which formed the cane casings or if they made bias little channels.  I opted for channels as that seemed easier to me.

I used a total of five channels per puff-two vertical and three horizontal just like the originals.  I used lengths of rattan cane for the 'boning' bits as I had a TON left over from a failed parasol project (well, not really failed-I just had to buy wider cane.  So now I have lots of this thinner stuff.  I am currently taking project requests that use a LOT of cane). They were then gathered into a band both at the top and bottom and the top had little cotton ties added on.  The middle cane I cut 36" long, the top 30", and the bottom 20".


Enjoy!

Monday, November 23, 2020

1830s Shifts, or Chemises

 Okay, I've finally stopped dragging my feet in doing actual important 1830s projects... let's build a wardrobe!  Starting with shifts!  I'm making two today.  Currently, I don't foresee doing more than one day events with the 1830s and a good rule of thumb is to have fresh underthings for each day of your event plus an extra pair.  Therefore, two seems to be about right for right now.

I used the directions on page 46 of "The Workwoman's Guide"-the gored shifts.  I tried doing the gusseted ones last time but they didn't turn out so I'm going a different route.  It's an earlier style, more regency, but as the WWG was published in 1838, still applicable to 1836.  There are many museums that have collections of similar chemises.

Museum of Fine Arts, Boston, early 19th century

Museum of Fine Arts, Boston, early 19th century

I was a little concerned about the width of fabric fitting across my bust, but the pattern actually ended up being too large.  I really could have gone with the third size.  I'll remember that for next time!  It was simple enough to make up from the engraving.  All sewing was worked by hand and the side seams were felled.  No piping was needed as per the directions and looking at originals.


Enjoy!

Monday, November 9, 2020

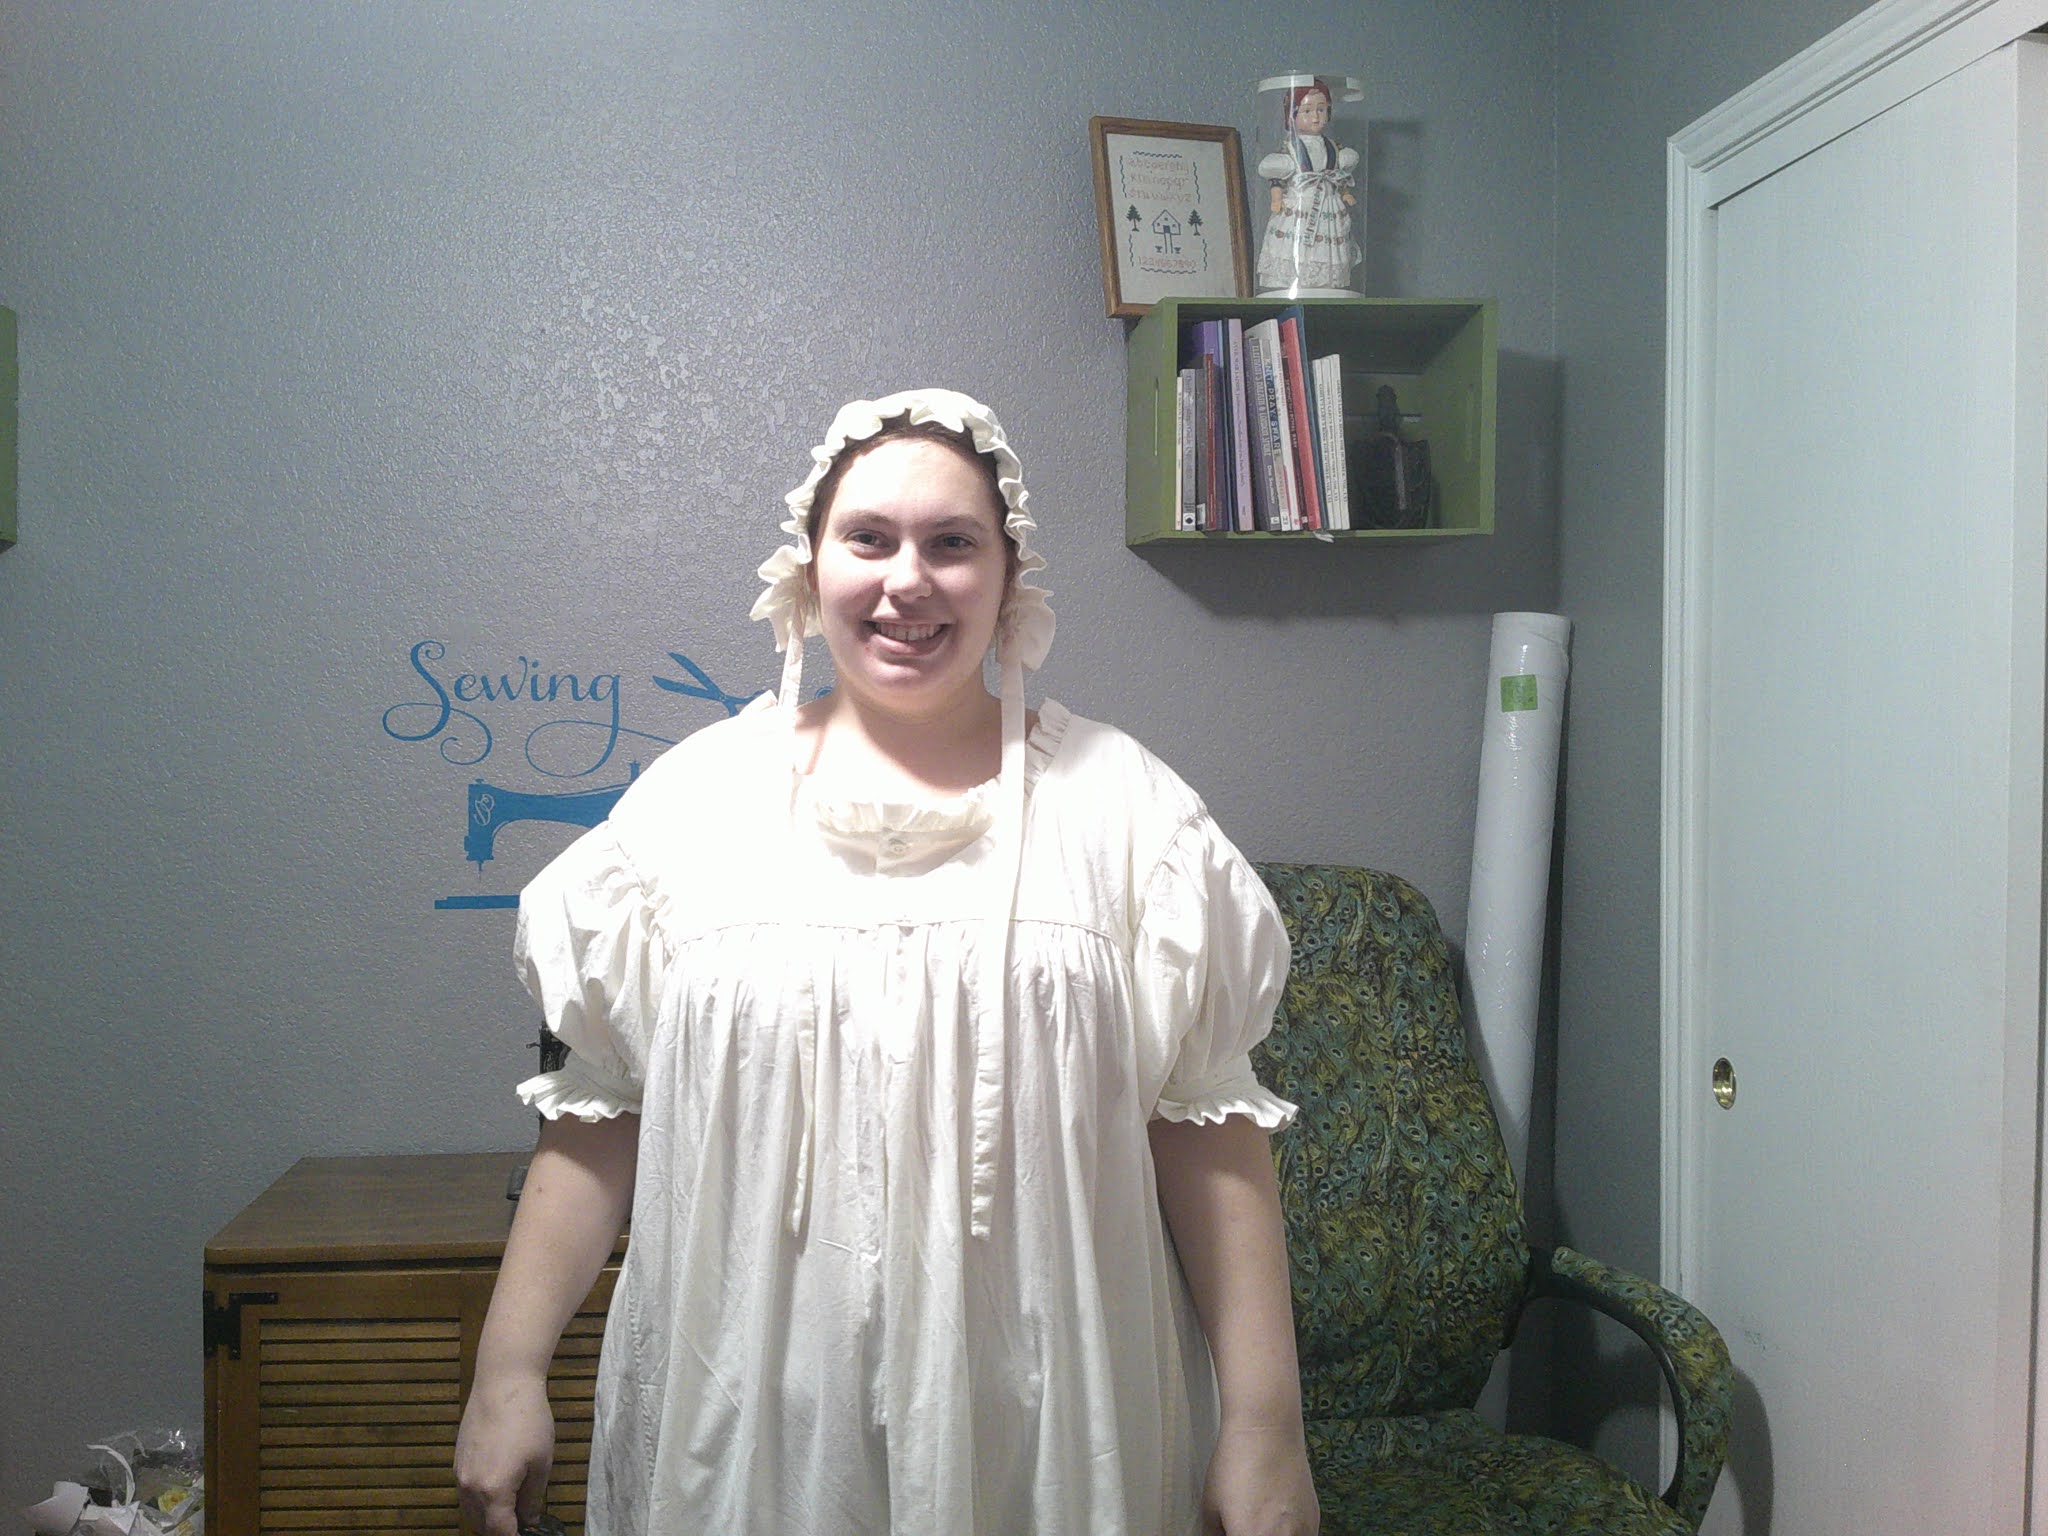
1830s Nightgown and Cap

 Not that I couldn't sleep in my chemise, mind you, but I find I enjoy having a fresh, clean nightdress to slip into at events.  And even when events do not call for night-time authenticity, I find wearing period clothes throughout the whole event helps me slip into character easier.  So, an 1830s nightgown was needed.

The Workwoman's Guide has directions for three different nightdresses.  One is quite plain, looking much like a chemise with an added ruffle.  The second, one with a high collar and the third with a yoke.  I found an original gown in the MET with a yoke so I went with the yoked nightdress instructions.

Metropolitan Museum of Art, 1830s

To modify the WWG pattern, I simply took the yoke pattern given, lengthened it a bit, then took out a big, square-ish shape chunk out of the neckline.  I also extended it across the shoulder and then cut the pattern to be half my measurement across my front, armpit to armpit.

For the body part, the WWG calls for 1 yard wide pieces cut 1.5 yards long.  1.5 yards was super long on me, I cut mine at 1.25 yards and still took up a 6" hem.  I also added gores to the side much like a chemise, although the pattern for that specific nightgown didn't mention gores.  There is another nightgown pattern 2 pages previous that does include gores, so I know the concept is correct.

The seams were run and felled and gathering threads were put on the front and back.  The front had to be slit down the center and narrow hemmed.  I added a ruffle to the neckline, about 1.25" in width and about 1.5 times the length of the neckline, so not a super full ruffle.

The yoke was piped, as per instructions (but apparently linen nightgowns do not need to be piped) and then sleeves were made.  As I lengthened the shoulder, the WWG directions for 18" square sleeves, was not going to work.  I cut mine 10" by 40", run and fell them, then gathered them into a ruffled band and then also into the armscye.

For the nightcap, I followed WWG instructions on page 62.  There wasn't much detail in the instructions, but I was able to figure it out with the help of other cap engravings.  I opted to put the ruffle all the way around the cap per a few originals I have seen and also other caps listed in the WWG.

Although I rarely use nightcaps, it is nice to have it and it only took a few hours to whip together by hand.  The nightgown I am pleased with as it is an open necked gown with shorter sleeves.  I can't wait to get to use them!


Enjoy!